Is your kitchen sink leaky or faulty? You might be in the urge to know how to replace a kitchen sink basket strainer, right? It is high time to ditch water leaking sink basket strainer. And the best thing is that you can do it yourself without hiring any plumber.
A sink is the core of the kitchen. A faulty or leaky sink basket strainer can produce quiet discomfort to your daily activities. So, you’ve to buy a kitchen sink which has all the features and flexibilities that you’re looking for. Once you’ve got the right basket strainer of the kitchen sink, the installation isn’t a difficult task at all. You can replace the kitchen sink basket strainer just following some easy steps.
Table of Contents
How To Check If Your Kitchen Sink Needs Replacement?

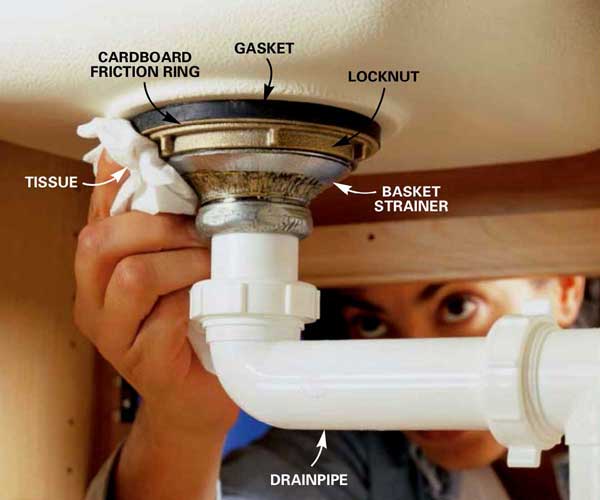
To become assured that the problem lies with your sink basket strainer, fill up your sink with water. Now place a tissue paper near the junction of the sink and drain pipe. If the tissue paper gets wet, it is confirmed that your basket strainer is indeed faulty and needs to be replaced.
Let’s learn how to replace your kitchen sink basket strainer following a few simple steps.
Things You Will Need:
- Plumber’s putty or stainless putty or silicone sealant
- Putty knife
- New sink basket strainer
- Plier
- Adjustable wrench
- Gloves (optional)
How To Replace A Kitchen Sink Basket Strainer – Step By Step Guideline
Are you here still with us? Well, that indicates your sink is at fault and you’ve already gathered all the essentials.
So, let’s proceed with our main guideline to continue with the replacement task!
Step 1: Loosen and remove the locknut and coupling nut
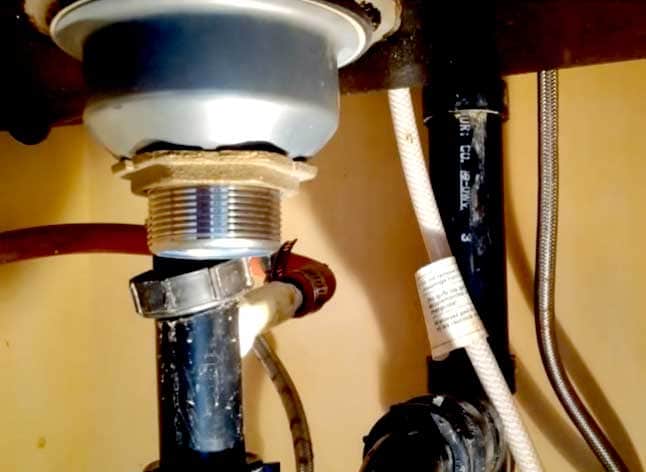
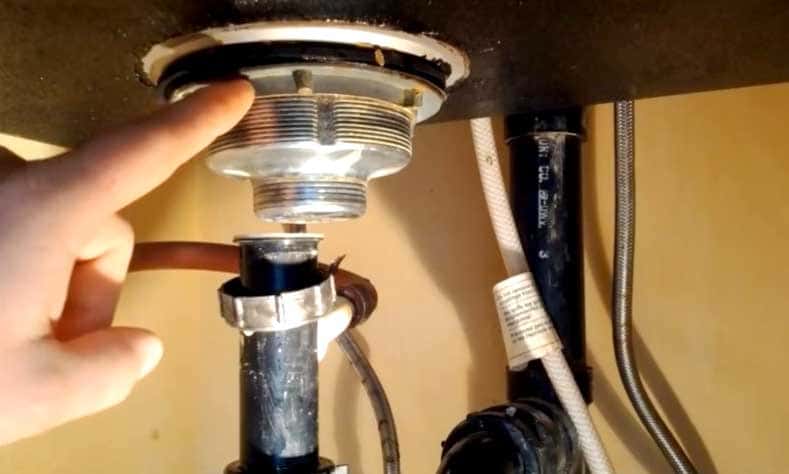
The locknut is a piece of pipe that is attached to the sink. And the coupling nut is the one that keeps the drainpipe fixed and secured. Unscrew the locknut with the help of slip-joint pliers. Now as you removed the locknut, it’s time to unscrew the large coupling nut from the top of the basket strainer. Get the job done with the help of a plier or adjustable wrench.

If a wrench is not available, you can get the job done with a hammer and chisel also. Seek help from someone to assist you with the basket strainer so that it doesn’t spin while removing the locknut. At this point, you will have complete access to the sink basket strainer.
Here remember one thing that, sometimes locknut gets stuck and doesn’t budge even after using spud wrench. In such a situation, you might need to cut the nut itself. Cut the locknut until you are reaching the cardboard friction ring. And while doing so, make sure you are not cutting the sink and wear protective goggles.
Step 2: Remove the sink basket strainer

Take away the sink basket strainer carefully. Lift it out from the top of the sink. Along with basket strainer, you will see a few smaller gaskets, rings or washers also falling down. Set these aside so that you can use them if any of the new ones get misplaced.
Step 3: clean the sink basket strain properly

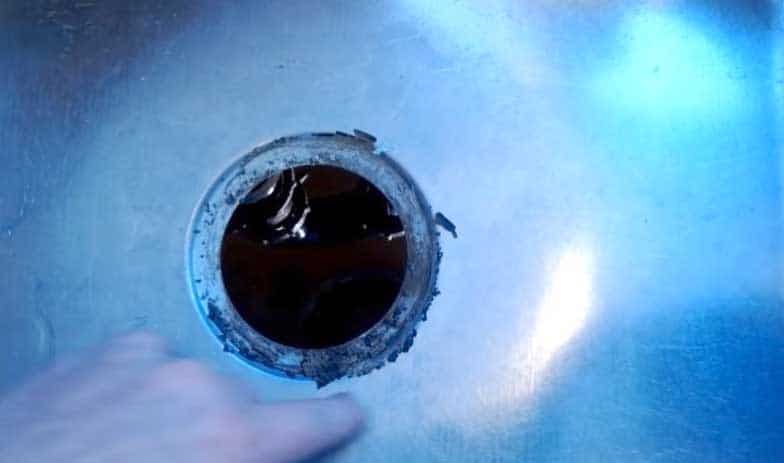
Before applying the sealant, you must clean the sinkhole thoroughly. Scrub both sides of the sinkhole using sponge and soap. Cleaning the sink hole properly is very important so that the putty can form a good bond. Once the cleaning is complete, dry it well.
Step 4: Disassemble new basket strainer
Usually sink basket strainers come with all necessary parts in an organized way. Detach the screws, gaskets and other parts carefully and set them aside. Carefully note the order these parts were assembled. Later it’ll be easier to assemble them in the same manner.
Step 5: Crosscheck your sink basket strainer material
Though plumber’s putty is generally a good default choice for sealing it can deteriorate plastic sinks and blemish stone or other porous material. Therefore if your sink basket strainer is made with any of these elements, try to avoid plumber’s putty.
Instead, you can use a silicone sealant for plastic or stainless putty for porous materials. If you are opting silicon sealant, load it into a sealing gun and apply some to the bottom of the basket edge. As this kitchen sink stopper sealant forms a very strong bond, your next replacement process will require some extra force.
And if your sink basket material is fine with sink strainer plumber’s putty, proceed towards the next step.
Step 6: Roll out a piece of putty
Before starting your task of applying putty, make sure your hands, putty knife and work station are dry and clean. Or else, if there is any moisture left, it’ll make the bond less effective. After a thorough examination, take a lump of putty and roll it into a dough snake. The putty dough should be enough to fit around the new basket strainer. If you find the putty hard and difficult to roll out, warm your hands from fire or any other heat source and then soften the dough with warm hands.
Step 7: Apply putty to the bottom part of the basket edge
Twist and flatten the dough evenly using your thumb against the surface. Take a small amount of putty just to cover the underside of the basket edge. Applying too much putty will leave you with extreme difficulty while pushing the basket flush with the sink.
Step 8: Press the basket strainer into the sink
Now it’s time to press the basket into the sink. Put moderate pressure to squeeze the basket down into the sink drain. Don’t push it too hard.
Step 9: Screw the nuts and washers
Now return to the bottom side of the sink and start assembling all the parts that come with the sink strainer. Carefully place the cardboard friction ring between the rubber washer and locknut. Then screw the locknut in place with the help of a plier or adjustable wrench.
Step 10: Remove excess putty
As you tighten the locknut you will see excess putty squeezing out. Throw away this excess putty using the putty knife. Tighten the nut again and remove the excess putty as before. While tightening the nut, don’t put too much pressure or else you may end up damaging it.
Step 11: Reattach the drainpipe
Now, the last task is to reattaching the pipe you removed. Reattach it first loosely at all points and then tighten properly. And if you feel your drainpipe is also problematic, consider plumbing kitchen sink drain leak or replacing drain pipe under the kitchen sink as well. Knowing how to fix kitchen sink drain clog will also prove useful if there is any block in the drainpipe.
Now, your new kitchen sink basket strainer is absolutely ready to use.
However, replacing a kitchen sink basket strainer is an easy and simple task to be done within an hour. You just need to be aware of the pitfalls that were discussed above. And selecting a durable quality sink strainer is also imperative.
Final Words
This was all for your kitchen sink basket strainer replacement. How was it? Actually, this kind of task needs a lot of patient and perfection to follow steps accordingly. If you follow these steps accordingly, you won’t face any unwanted hassle and will get a successful replacement.
More Resources:
